Itsostylish Sewing Pattern Drafting Courses Learn how to draft a sewing pattern for a straight skirt
A series of formal and informal lessons to get you started as a fashion designer and to take your skills to new heights.
Learn how to draft a sewing pattern for a straight skirt
Complete lesson on using the Itsostylish CAD to draft a pattern for a fitted straight skirt. The techniques learned in this lesson are for complete beginners and you will come away with knowledge on how to draft a pattern for a skirt both by hand and using computerised software such as the Itsostylish CAD.
Video
Introduction on drafting a straight skirt
Welcome to our comprehensive lesson on creating a custom-measured pattern for a straight shirt! If you've ever found yourself frustrated by the limitations of store-bought patterns or struggling to achieve the perfect fit, you're in the right place. In this lesson, we'll delve into the art and science of pattern construction, empowering you to design and sew a skirt that fits you like a glove.
Whether you're a seasoned sewing enthusiast or a beginner eager to learn, understanding how to create a custom pattern is a valuable skill that can elevate your sewing projects to new heights. A well-fitting shirt not only enhances your appearance but also boosts your confidence and comfort. By the end of this lesson, you'll be equipped with the knowledge and techniques to take precise measurements, translate those measurements into a pattern, and tailor it to your unique body shape.
We'll explore the fundamental concepts of pattern drafting, discussing the essential tools you'll need, from measuring tapes to rulers, and the importance of accurate measurements in achieving a flawless fit. You'll discover how to take various body measurements correctly, ensuring that your custom pattern captures your individual contours and proportions.
With a solid foundation in measuring techniques, we'll then guide you through the step-by-step process of transferring those measurements onto paper, creating the key pattern pieces that make up a shirt, such as the front and back bodice, sleeves, and collar. We'll cover the intricacies of grain lines, seam allowances, and ease, helping you understand how to manipulate the pattern to achieve different styles and levels of comfort.
Throughout this lesson, we'll provide helpful tips and tricks garnered from experienced pattern makers and tailors. By the end, you'll not only possess a meticulously constructed custom shirt pattern but also gain a deeper understanding of the principles behind pattern drafting. This knowledge will enable you to adapt and innovate in your future sewing endeavors, making your creations truly unique and perfectly tailored to you.
So, whether you're envisioning a crisp button-down shirt for a formal occasion or a casual everyday tee, this lesson will empower you to transform your fabric into a garment that reflects your personal style and fits you flawlessly. Let's embark on this creative journey of pattern construction and sewing mastery together!
Step 1 straight skirt
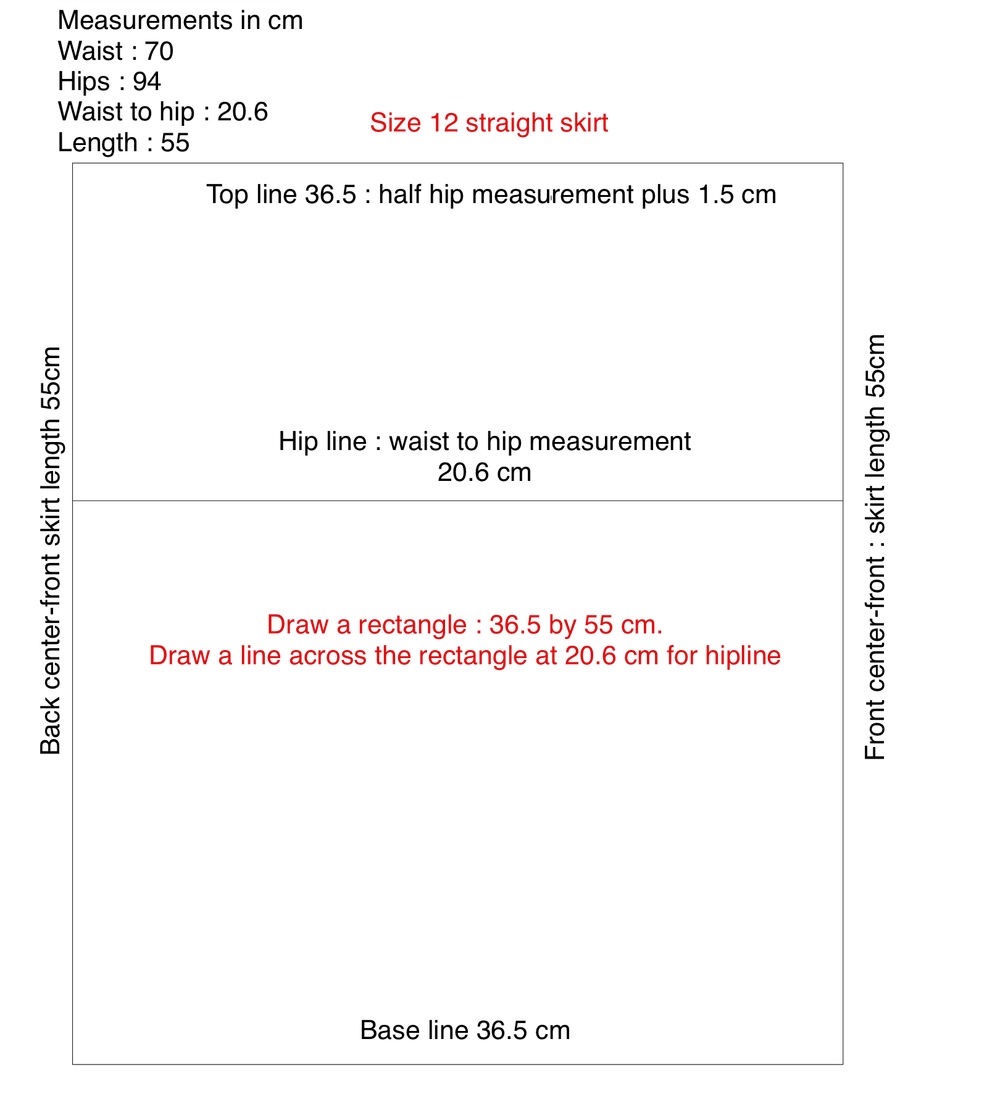
Draw 4 straight lines to create a rectangle. The width must be half the hip measurement plus 1.5cm, in this case it will be 35cm plus 1.5cm, which is 36.5cm. The length must be the desired skirt length. Here we choose a length of 55cm.
Draw a horizontal line across the rectangle at the hip line, which for these measurements is a line at a distance from the top of the rectangle at 20.6 cm—the waist to hip measurement.
Step 2 Straight Skirt
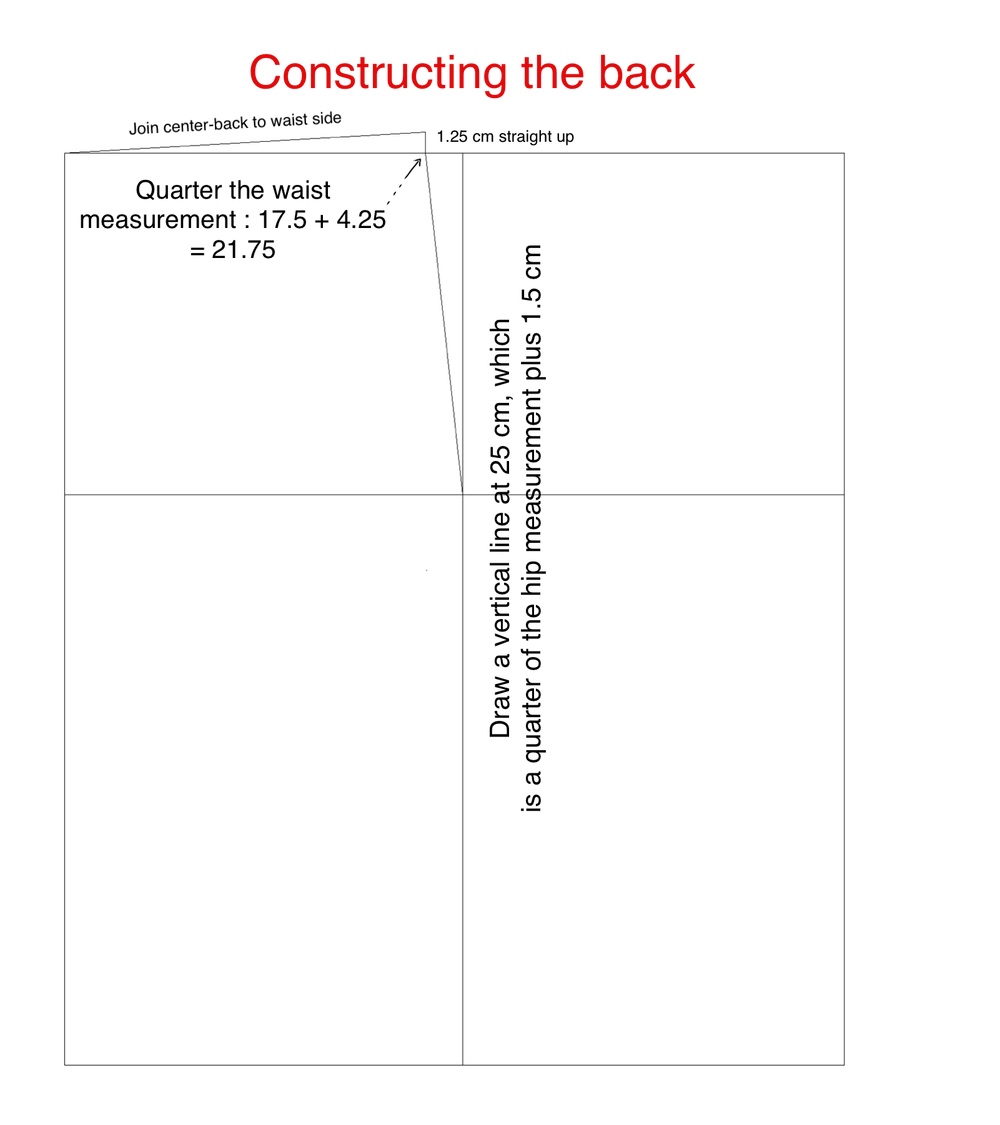
Mark a point on the top of the rectangle at ¼ the waist measurement plus 4.25 cm. In this case that is 21.75 cm. Draw a straight line from this point to a 1.25 cm point above the top of the rectangle. Join the uppermost left hand point of the rectangle to the point at 1.25cm above the line at a distance of 21.75cm.
Step 3 Straight Skirt

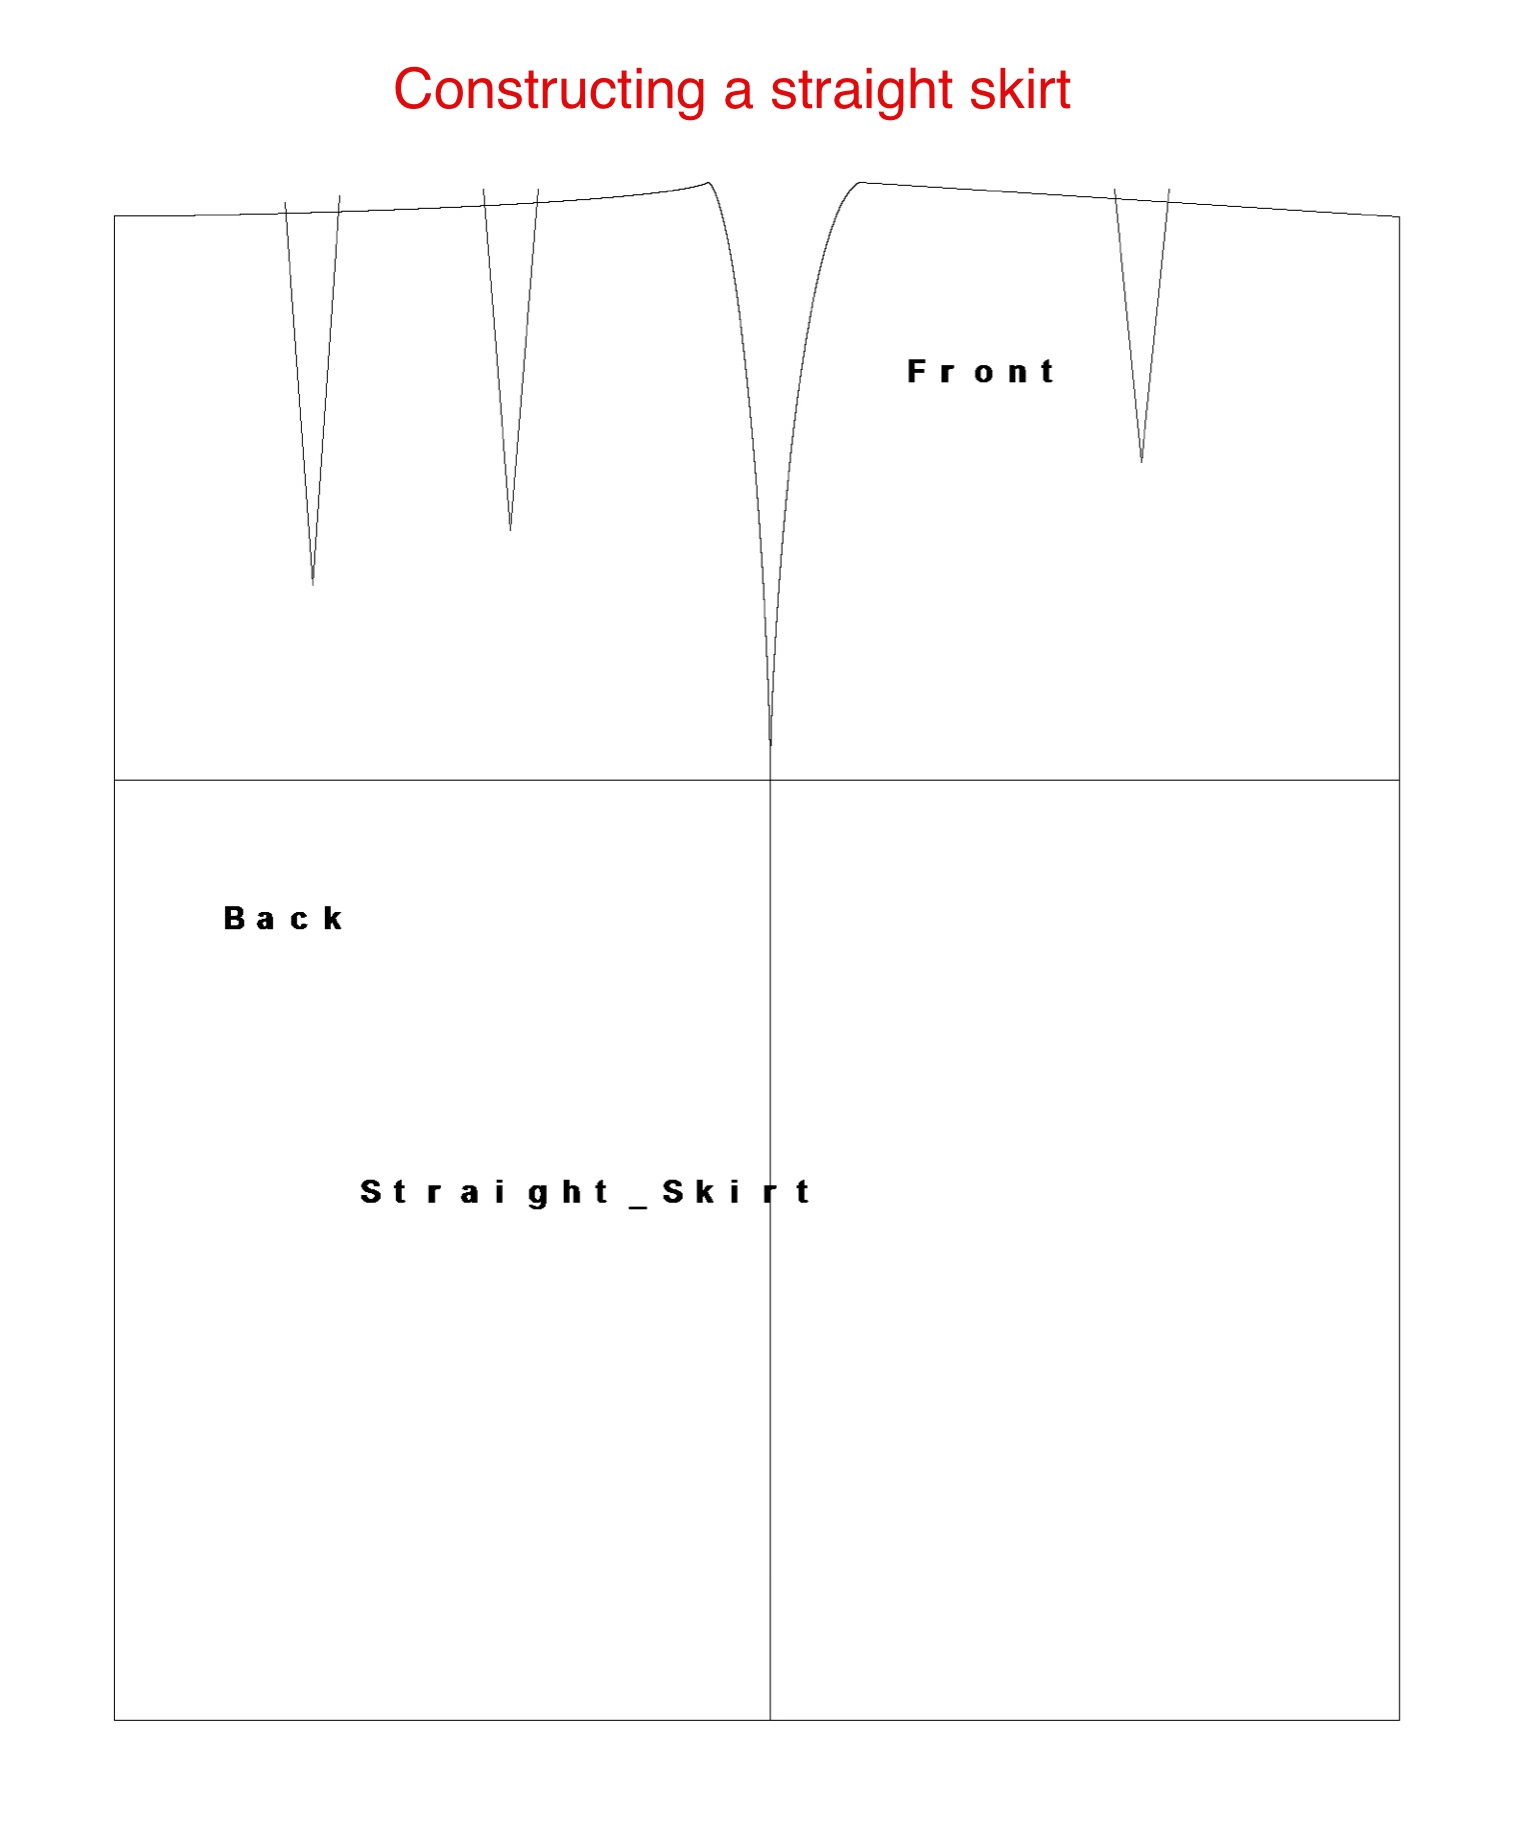
Darts: Draw a vertical line from the hip line to extend 1cm beyond the waistline, at a distance from the centre front of the rectangle, at a distance of 7.25cm and at 14.5cm. Draw in two darts of 2cm width each. The first must extend from the top of the first vertical line from the hip by 14cm and the second by 12.5cm. Draw in a curve at the waistline from the center front to the 1.25cm point above the line at a distance of 21.75cm. Draw in a curve for the hip to waistline, curve out by 0.5cm at 10cm down from the waistline. The back of the skirt is complete.
Step 4 Straight Skirt
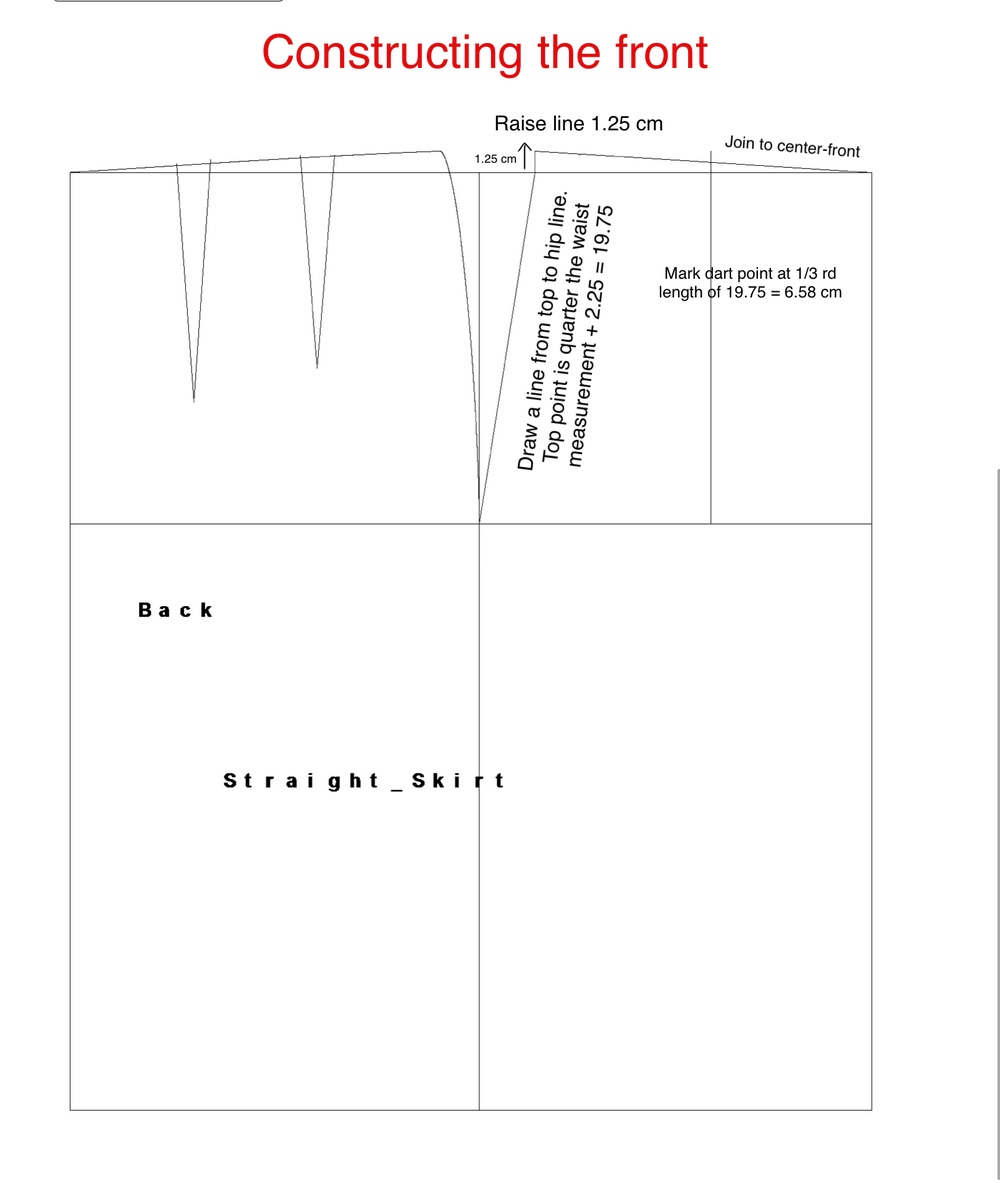
From the center front of the skirt measure a point on the top line of a quarter of the waist measurement plus 2.25 cm. mark a point at 1.25 cm above the top line at the waist measurement. Join this top point to the top of the center front line. Mark a dart point at 1⁄3 waist measurement on the hipline. Join the dart point with a vertical line that goes through the waistline from 10cm.
Step 5 Straight Skirt
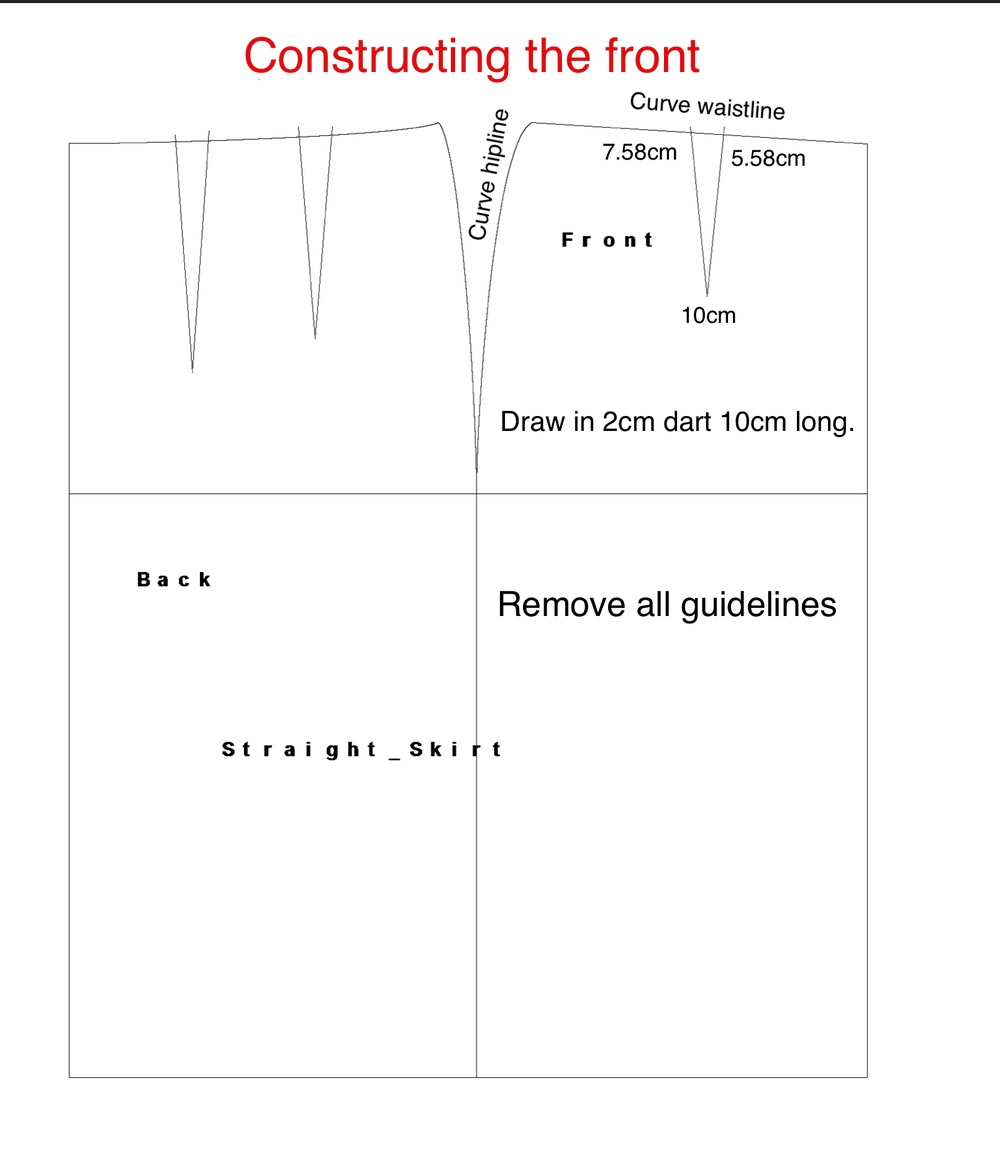
Draw in a 2 cm wide dart in the waist line. Neaten and draw in all curves.
Download Insructions